Overview
A useful publishing workflow turns separate editing skills into a repeatable process. Instead of deciding from scratch every time, you move through the same stages: prepare, edit, clarify, protect, export, and review.
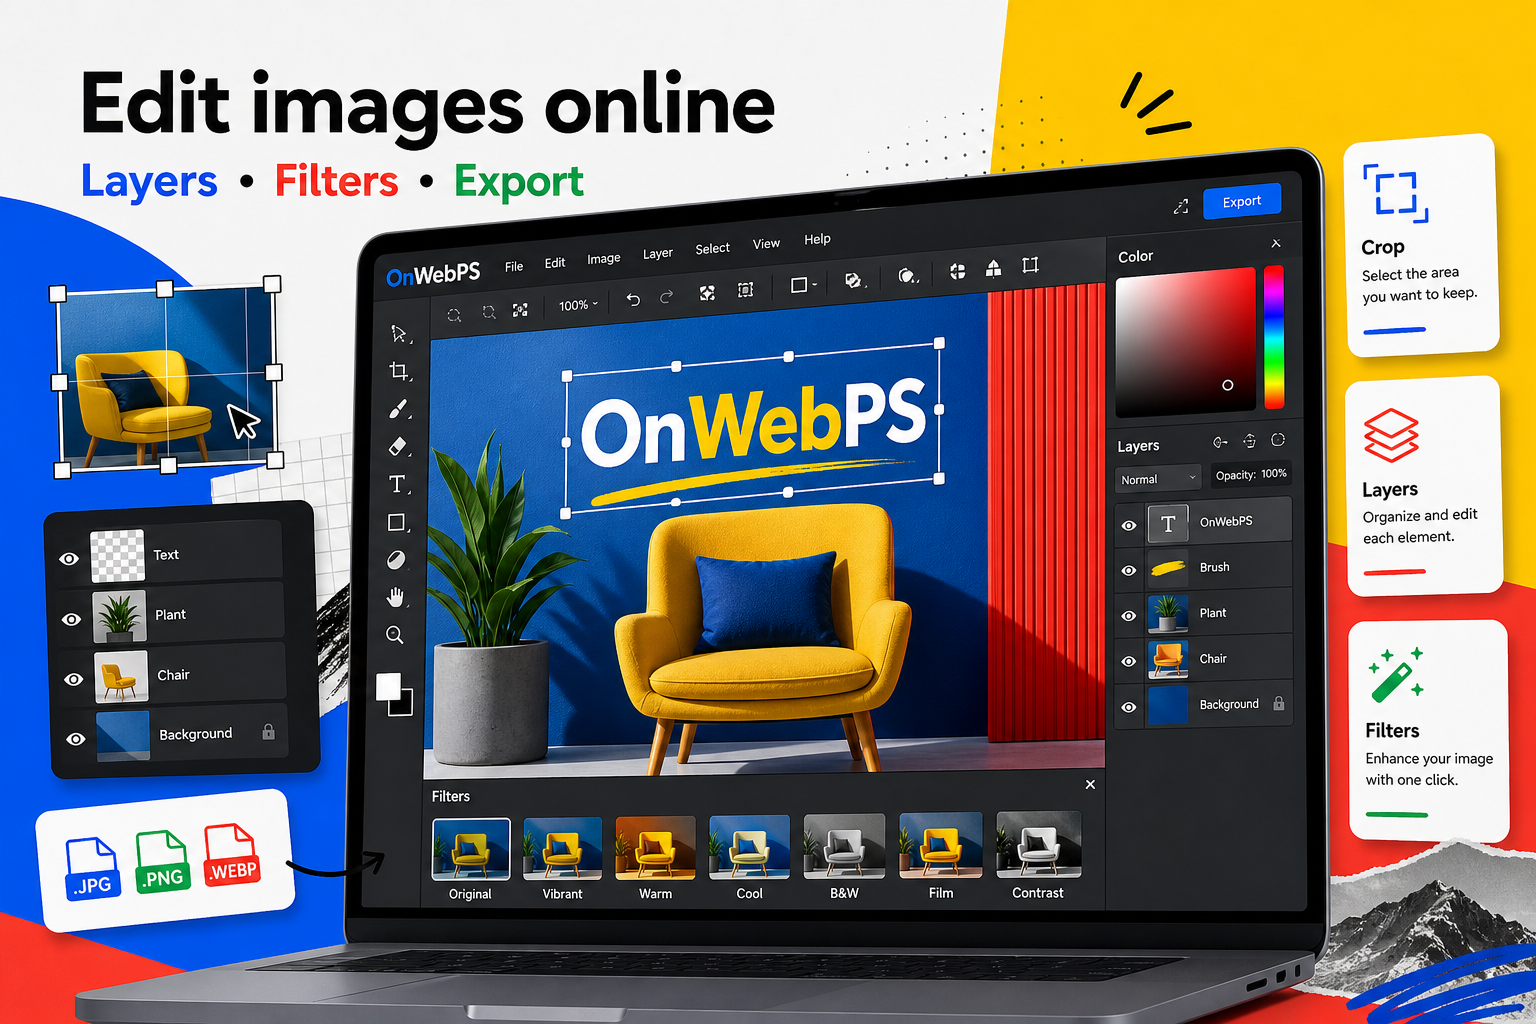
Use a copy of important images, keep reusable elements on separate layers, and decide the final destination before choosing crop, size, and export format.

Prepare the source
Choose the clearest image available and decide where it will appear. Article headers, inline screenshots, product examples, and comparison graphics have different size and readability needs.
In OnWebPS, keep the workflow practical: work on a duplicate when the change is risky, compare the edited result with the original, and export only after checking the image at the size where people will actually see it.
Create a safe working file
Open the image, duplicate the base layer, and keep editable text or shapes separate. This structure makes revisions easier when an article title changes or an editor asks for a different crop.
In OnWebPS, keep the workflow practical: work on a duplicate when the change is risky, compare the edited result with the original, and export only after checking the image at the size where people will actually see it.
Improve clarity first
Crop for the topic, correct brightness and contrast, and remove small distractions. Do this before adding labels or decoration. A clear base image needs fewer visual tricks later.
In OnWebPS, keep the workflow practical: work on a duplicate when the change is risky, compare the edited result with the original, and export only after checking the image at the size where people will actually see it.
Add explanation only where helpful
Use arrows, labels, or short text when they help the reader understand the image. Avoid filling the graphic with instructions that belong in the article body.
In OnWebPS, keep the workflow practical: work on a duplicate when the change is risky, compare the edited result with the original, and export only after checking the image at the size where people will actually see it.
Run the publishing check
Check private information, spelling, mobile readability, file size, and export format. Then save a final WebP, JPG, or PNG with a descriptive filename that matches the article topic.
In OnWebPS, keep the workflow practical: work on a duplicate when the change is risky, compare the edited result with the original, and export only after checking the image at the size where people will actually see it.
Concrete example
Example project: publishing a complete tutorial image set
For a long article, prepare a header image, two inline screenshots, one comparison collage, and one final export example. Use consistent labels, redact private details, compress every file, and keep layered working files until the article is approved.
Common mistake
Common mistake: treating export as the last thought
Export choices affect page speed, readability, and search quality. Decide format and dimensions as part of the workflow, not after everything else is finished.
Practical FAQ
What makes an article image workflow reliable?
A repeatable order: define the page context, protect the source, edit for clarity, add only helpful labels, check privacy, then export a small clear file.
Final checklist
- Start with the final page context.
- Keep layers editable until review is done.
- Improve the base image before decorating.
- Redact private details.
- Export a small clear web file.
This guide is intentionally practical: repeat the same steps on a real image, compare the before and after result, and keep the version that communicates the task most clearly.