Overview
Background removal is useful for product images, profile graphics, thumbnails, and classroom materials. A clean cutout depends on choosing the right selection method, checking the edge, and exporting a format that preserves transparency.
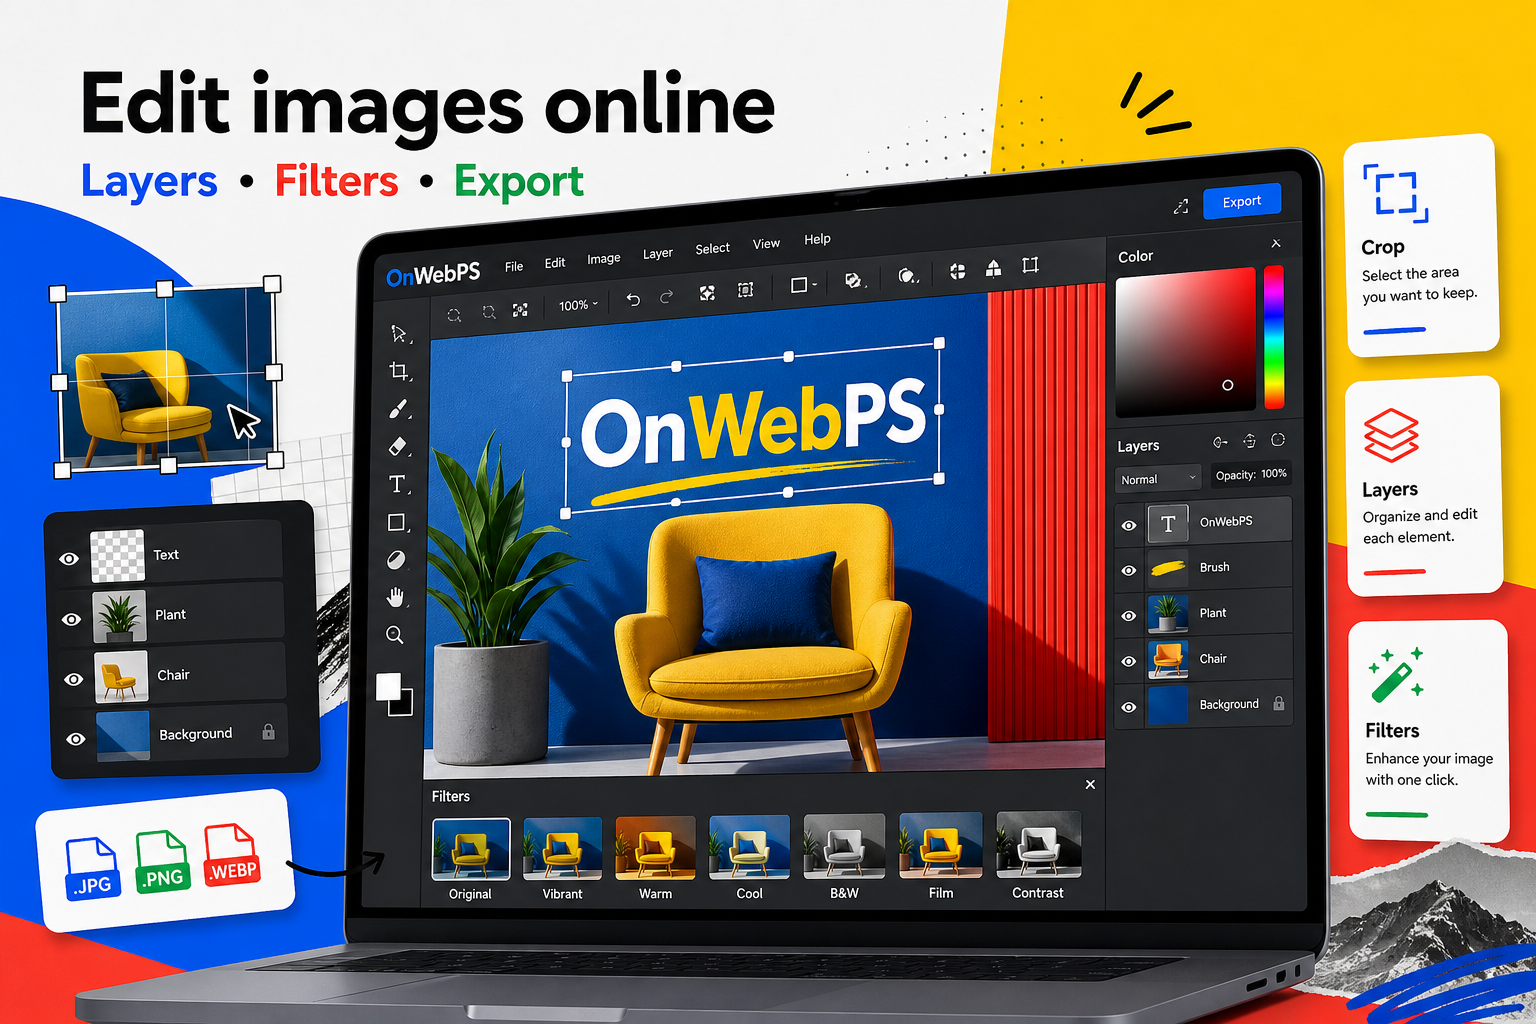
Use a copy of important images, keep reusable elements on separate layers, and decide the final destination before choosing crop, size, and export format.

Start with the easiest edge
If the subject is on a plain background, use a color-based selection or magic-style selection first. Select the background rather than the object when the background is simpler. Then delete or mask the selected area.
In OnWebPS, keep the workflow practical: work on a duplicate when the change is risky, compare the edited result with the original, and export only after checking the image at the size where people will actually see it.
Refine the difficult parts
Edges around hair, fabric, plants, and reflections need patience. Zoom in, use smaller selections, and remove leftover background pixels gradually. A slightly smaller clean edge is often better than a larger edge with a visible halo.
In OnWebPS, keep the workflow practical: work on a duplicate when the change is risky, compare the edited result with the original, and export only after checking the image at the size where people will actually see it.
Check on two backgrounds
A cutout can look fine on white but show problems on dark colors. Add a temporary dark layer behind the subject, then a light layer, and inspect both. Delete the test layers before export.
In OnWebPS, keep the workflow practical: work on a duplicate when the change is risky, compare the edited result with the original, and export only after checking the image at the size where people will actually see it.
Create a natural shadow when needed
Product cutouts may look like stickers without a grounding shadow. Add a soft dark shape beneath the object, reduce opacity, and blur it slightly. Keep the shadow subtle so it supports the subject rather than calling attention to itself.
In OnWebPS, keep the workflow practical: work on a duplicate when the change is risky, compare the edited result with the original, and export only after checking the image at the size where people will actually see it.
Export transparency correctly
Use PNG when the background must stay transparent. JPG does not support transparency and will fill the empty area with a flat color. WebP can support transparency in many workflows, but PNG remains a safe choice for reusable assets.
In OnWebPS, keep the workflow practical: work on a duplicate when the change is risky, compare the edited result with the original, and export only after checking the image at the size where people will actually see it.
Concrete example
Example project: reusable product cutout
Use a plain-background product photo, select the background, remove it, check the edge on black and white test layers, then export a transparent PNG. You can reuse that PNG in banners, comparison images, and store cards without repeating the cutout work.
Common mistake
Common mistake: leaving a halo around the subject
A white or dark outline may be invisible on the original background but obvious on a new color. Test the cutout on contrasting backgrounds before export.
Practical FAQ
Should I export a cutout as PNG or JPG?
Use PNG when transparency matters. JPG cannot preserve transparent pixels and will fill the background with a flat color.
Final checklist
- Select the simplest area first.
- Zoom in for edge cleanup.
- Test the cutout on light and dark backgrounds.
- Use subtle shadows for product assets.
- Export PNG for reliable transparency.
This guide is intentionally practical: repeat the same steps on a real image, compare the before and after result, and keep the version that communicates the task most clearly.