Overview
Filters are tempting because they create instant change. The problem is that strong filters can damage skin tones, product accuracy, and small details. A controlled workflow gives you mood without losing trust.
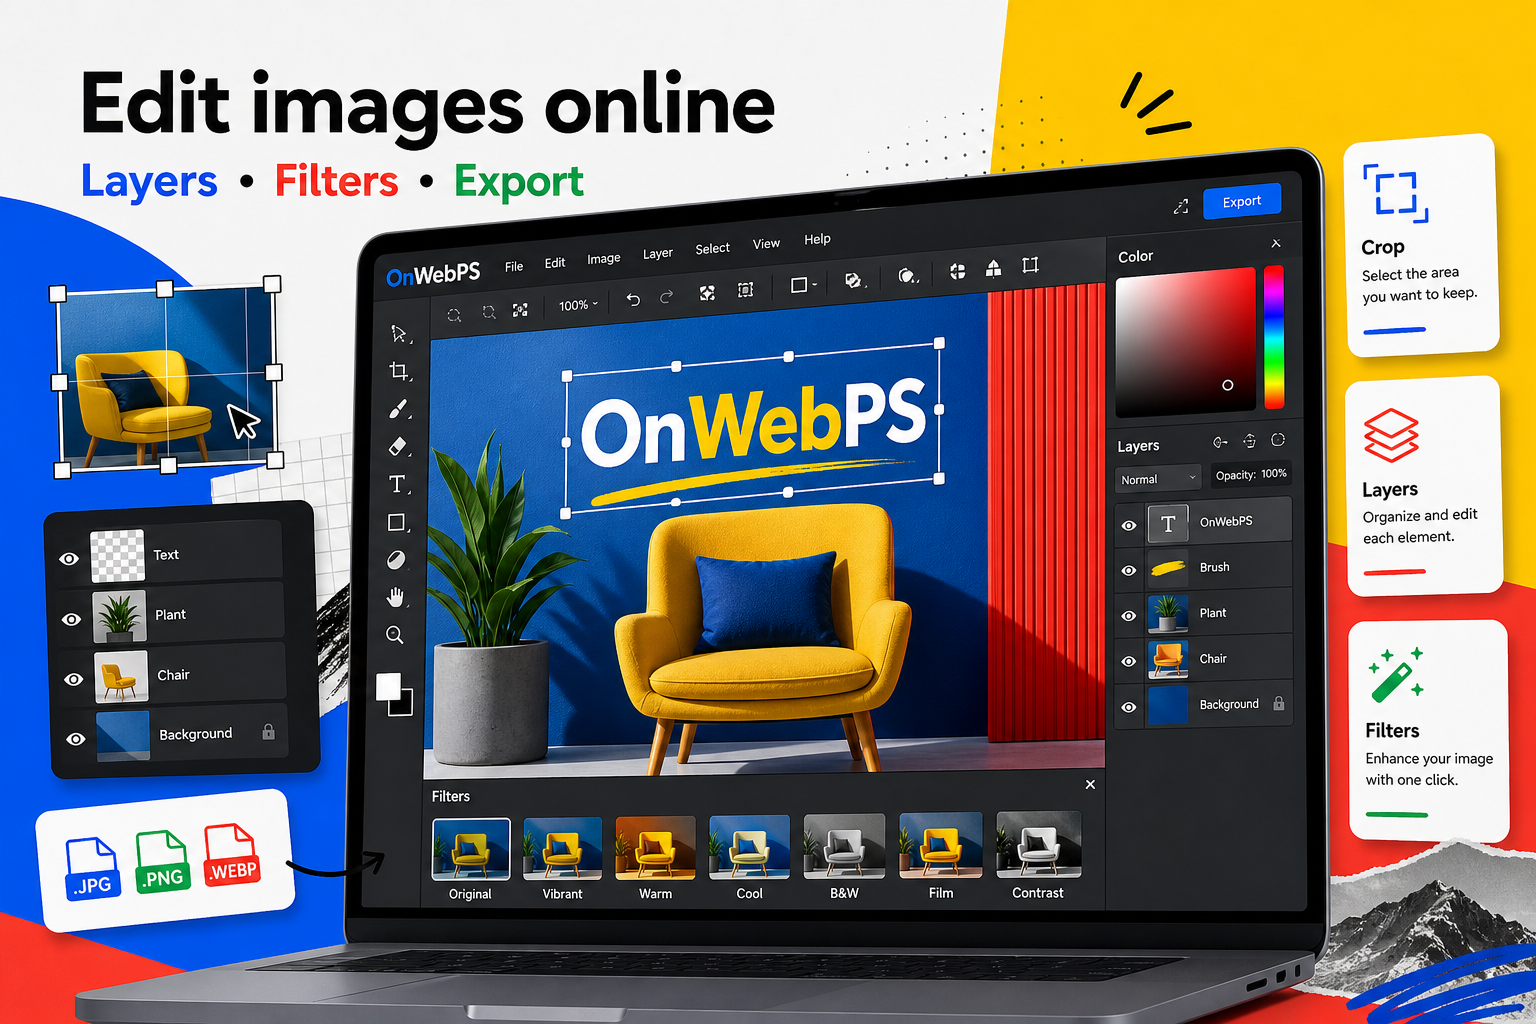
Use a copy of important images, keep reusable elements on separate layers, and decide the final destination before choosing crop, size, and export format.

Correct before styling
Start with brightness and contrast before applying creative effects. If the image is too dark, too flat, or badly cropped, a filter will not solve the underlying problem. Fix the base image first.
In OnWebPS, keep the workflow practical: work on a duplicate when the change is risky, compare the edited result with the original, and export only after checking the image at the size where people will actually see it.
Duplicate the layer
Apply the filter to a duplicate layer so you can compare before and after. Lower opacity if the effect is attractive but too strong. This simple habit turns filters into adjustable decisions.
In OnWebPS, keep the workflow practical: work on a duplicate when the change is risky, compare the edited result with the original, and export only after checking the image at the size where people will actually see it.
Protect important colors
Skin, food, clothing, and product packaging can become unrealistic quickly. If color accuracy matters, keep saturation modest and check the image against the original. A beautiful effect is not useful if it misrepresents the subject.
In OnWebPS, keep the workflow practical: work on a duplicate when the change is risky, compare the edited result with the original, and export only after checking the image at the size where people will actually see it.
Use sharpening late
Sharpening works best after resizing and basic corrections. Too much sharpening creates halos around edges and noise in flat areas. Use it only when details look slightly soft at final size.
In OnWebPS, keep the workflow practical: work on a duplicate when the change is risky, compare the edited result with the original, and export only after checking the image at the size where people will actually see it.
Create a consistent set
When editing several images for one article or shop page, use similar correction strength. Consistency makes the page feel organized. Random filters can make one set of images look like they came from different projects.
In OnWebPS, keep the workflow practical: work on a duplicate when the change is risky, compare the edited result with the original, and export only after checking the image at the size where people will actually see it.
Concrete example
Example project: matching a set of travel photos
Open three travel photos from the same article. Correct exposure first, reduce extreme saturation, then apply a mild warm look consistently. The set should feel related without making skies, skin, or food look unnatural.
Common mistake
Common mistake: stacking too many effects
A filter, extra contrast, saturation, and sharpening can quickly create harsh edges and strange color. Use one correction at a time and compare with the original.
Practical FAQ
How do I know when a filter is too strong?
If the viewer notices the filter before the subject, reduce it. Natural color and clear focus usually perform better for tutorials and products.
Final checklist
- Fix exposure before filters.
- Use filter layers or duplicates.
- Keep saturation believable.
- Sharpen near the end.
- Apply a consistent style across related images.
This guide is intentionally practical: repeat the same steps on a real image, compare the before and after result, and keep the version that communicates the task most clearly.